Table of Contents
Empowering Tokenization with Token Tool: A Simple Guide to Creating Your Own Crypto Token
The number of crypto tokens has more than doubled in 2022-2023, showing the importance and increased application of asset tokenization. The burgeoning world of crypto tokens has opened up a myriad of possibilities, revolutionizing asset ownership and facilitating groundbreaking applications. However, creating a token often requires technical expertise and knowledge of smart contracts, posing a challenge for those without coding proficiency.
Crypto tokens are smart contracts that run on existing blockchains that supports smart contracts creation (e.g Ethereum). It is important to note that while a token is a crypto-asset, it is not a cryptocurrency such as ETH, the latter is native to its own blockchain, while the other is created on that blockchain.
Before creating your own token
Before embarking on your token creation adventure, familiarize yourself with the fundamentals of crypto tokens. These digital assets exist on blockchains, representing ownership of real-world assets or representing utility within a decentralized application (DApp). Once you’re familiar with the building blocks of tokenizing an asset, and/or kicking off a DeFi project, make sure you have the items below ready as you step into your token creation journey:
- Supported Wallet: To be able to create tokens using Bitbond’s token tool, you need first make sure that you own one of the supported crypto wallets. Supported wallets are MetaMask, Coinbase Wallet, and WalletConnect. It is critical to use a reputable wallet, so make sure to do the proper research prior to using any wallet. Learn more about crypto wallets to understand the differences.
- Ensure sufficient funds in your wallet: make sure you have enough funds available in your wallet to cover network and service fees. Fees are paid in the native cryptocurrency of the network used to create your own token. For example, if you’re using Ethereum as the network of choice, then fees will be paid in ether (ETH).
- Research network on which to create your own token: crypto tokens remain on the blockchain on which they were deployed. Each blockchain network has its own governance rules, advantages, and supports different token standards. The Ethereum blockchain positioned itself as the market leader in terms of total transactions and popularity for DeFi applications. However, it is known to suffer from congestion leading to high gas fees. Researching the appropriate network fulfilling your needs is therefore important.
- Select a Network and Token Standard (ERC-20, ERC-1400): selecting a suitable blockchain network and token standard are the first steps of defining the features of your own token. As each blockchain supports distinct token standards, the decision of your token’s standard will also depend on the network used.
As launching crypto tokens has gained in popularity, creating tokens requires specific knowledge in regards to writing smart contracts which compose the foundation of tokenization on blockchain. To bridge this gap, we introduced Token Tool, a user-friendly platform that simplifies the token creation process, enabling anyone to effortlessly mint their own crypto token in just a few clicks.
Create your own crypto token in 6 easy steps
Step 1: Go to Token Tool and select the blockchain network
First, go to Bitbond Token Tool and select “Create Token” from the left menu bar. Then select the “DeFi Token”, this function enables you to easily configure and deploy the smart contract on the supported network of your choice.
Then, select the network you wish to create the tokens on. You can find the network selection drop-down menu at the top right, next to the “Connect Wallet” button. Token Tool currently supports 9 blockchain networks, as well as their respective testnets:

Step 2: Connect your wallet
Then connect your wallet by clicking on the “Connect Wallet” button at the top right. Select the wallet of your choice from the pop up window, you can choose from a wide range of the most popular wallet providers. Make sure that you’re connected to the same network in your wallet as the one you selected on Token Tool. You will be asked to confirm the connection to Token Tool in your wallet, once complete you will be ready to start creating your token:

Tip: make sure to go through the profile completion steps by submitting some information. Once you reach 100%, you will receive a discount code that you can use for your next purchase on Token Tool.
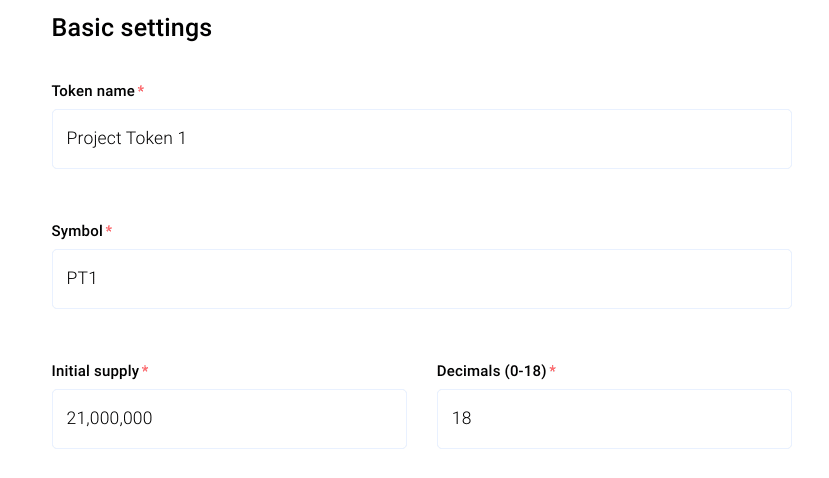
Step 3: Define token properties
Now, let’s get our hands dirty and start with creating your own token. Token Tool takes off the technical hassle behind creating a token away from the user and it makes the process as easy as filling in a form. Start by defining your token properties such as Token name, Symbol, Initial supply, and Decimals:
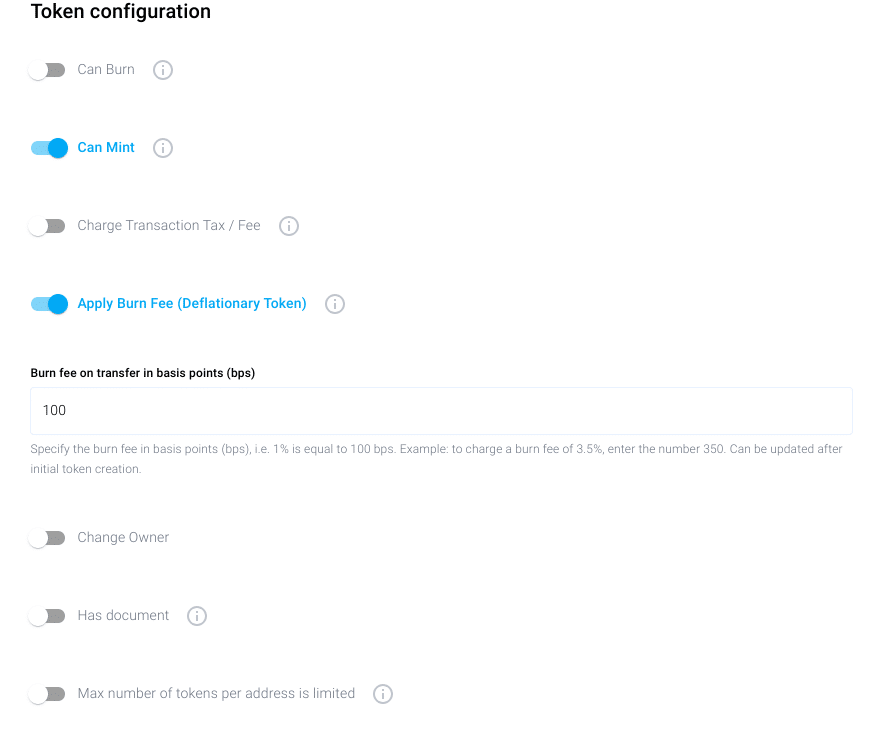
Step 4: Specify your own token’s features
Under the “token configuration” section, you can enable specific features for your token. Depending on your project’s tokenomics, you may want your token to be able to behave in a certain way. For example, you may want to apply a burn rate for it to be a deflationary token.
Important: smart contracts are immutable once they are deployed to the network. The code of the token cannot be changed once created. So if for example you enable to possibility to mint extra tokens after initial creation by activating the “Can Min” feature, then you cannot deactivate that at a later stage. We highly recommend you carefully select your features, otherwise, you’d need to recreate a new token in case of a mistake. You can find all the details about the features in our documentation.
Step 5: Confirm transaction and pay fees
After specifying the properties and features of your token, make sure to review that all information for your token is correct. Then click on “Create Token” at the bottom of the page.
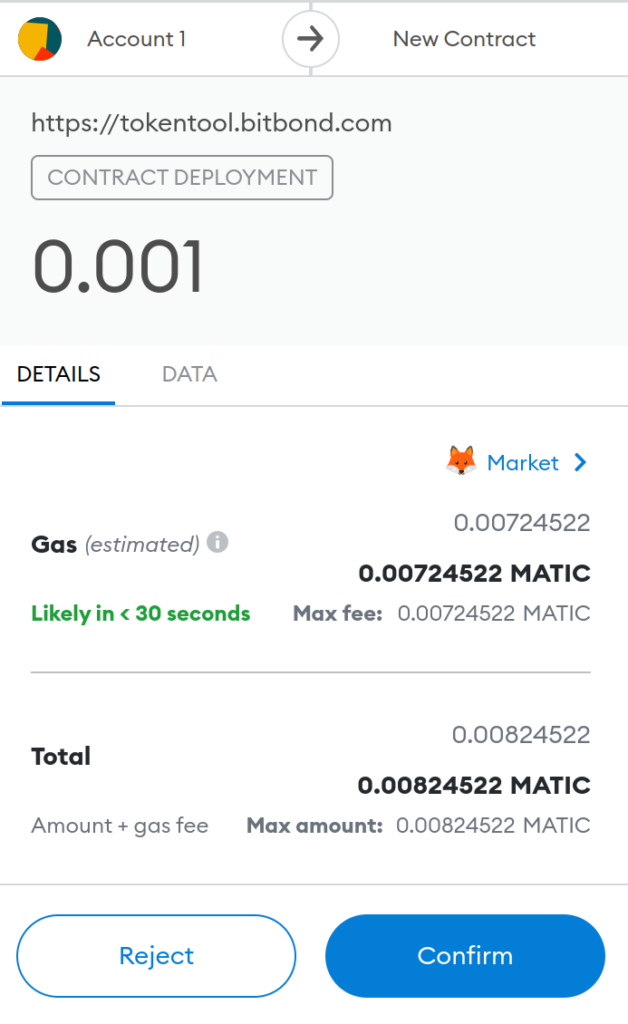
The last step before your token is deployed to the network is to confirm the transaction in your wallet and pay the respective fees. Click “Confirm” and it will take a few seconds until your token is created:
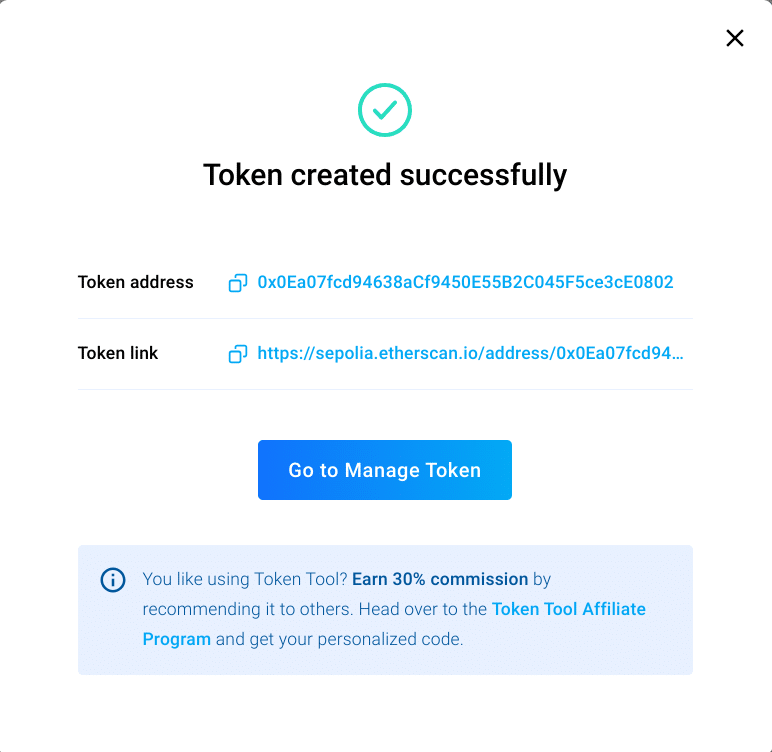
Step 6: Congratulations you successfully created your own token!
Creating a token is that easy with Token Tool. The tokens will be automatically created and deployed to the selected network once the transaction is confirmed and processed.
A pop up window will appear with the block explorer link and token address. You can manage your token at any point using the token contract address to take actions.
Try It Out on Token Tool’s Testnet
Experience the ease of token creation on Token Tool’s testnet, where you can experiment with token features and functionalities without risking real-world assets.
Unleash the Power of Tokenization with Token Tool
Creating your own crypto token can be cumbersome when you lack the necessary expertise. Token Tool empowers you to create your own crypto token, unlocking a world of possibilities. Embrace tokenization and join the revolution of decentralized ownership and value.
Should you have any questions, we are gladly available for you, simply reach out via [email protected] or learn more in our resources center.